Safety Precautions and General Information
Always wear proper PPE, including safety glasses and gloves, when installing or operating the lift․ Ensure the area is clear of obstacles and flammable materials․ Never exceed the lift’s load capacity․ Follow all manufacturer guidelines to avoid accidents․ Regular inspections by certified personnel are essential for safe operation․
- Keep loose clothing tied back and avoid jewelry that could get caught․
- Ensure the lift is installed on a level, stable surface․
- Refer to the installation manual for specific safety warnings․
1․1․ Importance of Following Safety Guidelines
Adhering to safety guidelines is crucial for preventing accidents and ensuring the longevity of your rotary lift․ Proper installation and maintenance procedures protect both the equipment and the operator from potential hazards․ Ignoring safety protocols can lead to equipment damage, personal injury, or even legal consequences․ Always follow the manufacturer’s instructions to ensure a safe and reliable operation․ Regular inspections and adherence to load capacity limits are essential for maintaining a secure working environment․ Safety should never be compromised for convenience or speed․
1․2․ Safety Warnings and Precautions
Never exceed the lift’s maximum load capacity, as specified in the manual․ Ensure the lift is properly anchored to the floor to prevent tipping․ Avoid operating the lift near water or in humid environments to reduce the risk of electrical hazards․ Always ensure the area is well-ventilated and free from flammable materials․ Never allow unauthorized personnel to operate the lift, and keep bystanders at a safe distance․ Failure to follow these precautions can result in serious injury or equipment damage․
- Do not operate the lift if any components appear damaged or worn․
- Ensure all safety locks and latches are engaged before raising a vehicle․
1․3․ Personal Protective Equipment (PPE) Requirements
Wear appropriate PPE during installation and operation to minimize injury risks․ Safety glasses protect eyes from debris, while gloves prevent cuts and ensure a firm grip․ Steel-toe boots are essential for foot protection․ A dust mask is recommended when drilling or grinding․ Ensure all PPE meets industry safety standards․ Hard hats are necessary if working in areas with overhead hazards․ Proper attire, free from loose ends, prevents entanglement in moving parts․ Adhering to PPE requirements is crucial for a safe working environment․
- Safety glasses or goggles for eye protection․
- Heavy-duty gloves for hand protection․
- Steel-toe boots for foot safety․
Pre-Installation Requirements
Ensure the installation area is clear, well-ventilated, and free from obstructions․ Verify the concrete slab’s condition and thickness meet the lift’s specifications․ Gather all necessary tools and materials beforehand for a smooth process․
- Check the floor for any cracks or unevenness․
- Confirm the lift’s load capacity matches your needs․
- Review the installation manual for specific requirements․
2․1․ Choosing the Right Location for the Lift
Selecting the right location for your rotary lift is critical for safe and efficient operation․ Ensure the area is spacious enough to accommodate the lift and any vehicles it will support․ The floor must be level, made of reinforced concrete, and free from cracks․ Proper drainage is essential to prevent water accumulation․ Avoid areas near flammable materials or overhead obstructions․ Ensure easy access to power sources and sufficient clearance for the lift’s arms to function without interference․ Consult the installation manual for specific spatial requirements․
2․2․ Checking the Condition of the Concrete Slab
Before installation, inspect the concrete slab for cracks, unevenness, or damage․ Ensure it meets the manufacturer’s thickness and strength requirements․ Check for moisture, as it can compromise the lift’s stability․ Test the slab’s surface for levelness using a spirit level․ Address any defects or uneven areas before proceeding․ If the slab is unsuitable, consider using reinforced steel plates as an alternative․ A stable base is crucial for safe and proper lift operation․
- Look for surface cracks or signs of wear․
- Verify the slab’s thickness with a professional if unsure․
- Ensure the area is dry and free from water damage․
2․3․ Tools and Materials Needed for Installation
Ensure you have all necessary tools and materials before starting․ Essential tools include wrenches, sockets, a drill, and a spirit level․ Materials needed are anchor bolts, concrete anchors, and epoxy resin for securing the lift․ Check the installation manual for specific requirements․ Verify the kit includes all hardware and components․ Consult the manufacturer if any items are missing or unclear․ Proper preparation ensures a smooth and efficient installation process․
- Verify the kit’s completeness before starting․
- Use high-quality materials to ensure durability․
- Refer to the manual for any specialized tools required․

Unboxing and Inventory
Carefully open the crate and inspect for damage․ Verify all components are included as per the installation manual․ Ensure no parts are missing or damaged․
- Check for any visible damage during unboxing․
- Organize parts to ensure efficient installation․
- Document any issues immediately․
3․1․ Steps to Unbox the Rotary Lift
Begin by carefully inspecting the crate for any visible damage․ Open the crate using appropriate tools, ensuring all components are secure․ Remove the lift and accessories, checking for any signs of shipping damage․ Use the inventory list from the installation manual to verify all parts are included․ Organize the components in a clean, dry area to prevent loss or misplacement․ Ensure all hardware and instructions are accounted for before proceeding to the next step․
- Inspect the crate before opening․
- Remove components carefully to avoid damage․
- Compare items with the inventory list․
- Organize parts for easy access during installation․
3․2․ Verifying the Completeness of the Kit
Once unboxed, cross-reference all components with the installation manual’s inventory list․ Ensure no parts are missing or damaged․ Check for essential items like lift posts, arms, and hardware․ Verify the inclusion of accessories such as hydraulic hoses and safety locks․ If any components are missing or damaged, contact the supplier immediately․ Organize the parts in a designated area for easy access during installation․ A complete and undamaged kit is crucial for a smooth installation process․
- Compare each item with the inventory list․
- Inspect for visible damage or defects․
- Report any discrepancies to the supplier․
- Organize parts for efficient installation․
Installation Process
Position the lift in the designated area, ensuring it is level and secure․ Assemble the posts and arms according to the manual․ Anchor the lift to the floor for stability․
4․1․ Positioning the Lift in the Designated Area
Ensure the lift is placed on a level, stable surface․ Use a spirit level to verify even ground․ Check the concrete slab’s condition for cracks or weaknesses․ Position the lift away from overhead obstructions․ Mark the floor where the lift will be anchored․ Ensure proper clearance around the lift for safe operation and maintenance․ Refer to the manual for specific measurements and layout recommendations․ Proper positioning is crucial for safety and functionality․ Always follow the manufacturer’s guidelines for placement․
4․2․ Assembling the Lift Posts and Arms
Begin by assembling the lift posts according to the manual’s instructions․ Attach the arms to the posts, ensuring proper alignment․ Tighten all bolts securely, following the recommended torque specifications․ Use a torque wrench to verify tightness․ Double-check the arm locking mechanisms for smooth operation․ Ensure all moving parts are properly lubricated․ Misalignment or improper assembly can lead to malfunctions․ Refer to the installation guide for diagrams and step-by-step instructions․ Always follow safety protocols during assembly to prevent accidents․
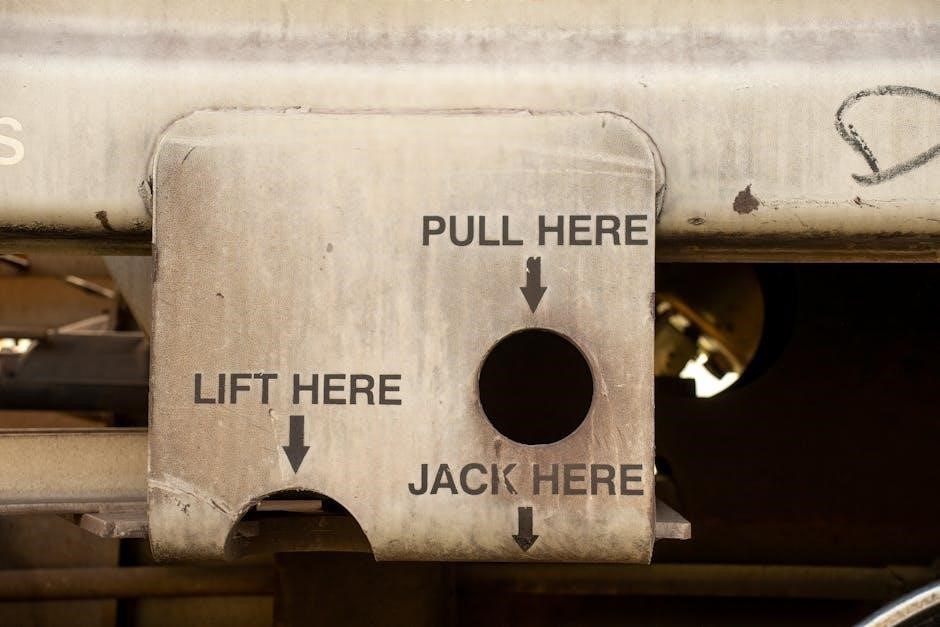
4․3․ Anchoring the Lift to the Floor
Anchoring the lift to the floor is critical for stability and safety․ Use the provided anchor bolts to secure the lift to the concrete slab․ Ensure the concrete meets the minimum thickness and strength requirements․ Drill pilot holes as specified in the manual, then insert and tighten the bolts evenly․ Check the torque specifications to ensure proper tightness․ If the slab is insufficient, consider consulting a professional or using reinforced anchoring solutions․ Proper anchoring prevents lift movement during operation, ensuring safe and reliable performance․
- Verify the concrete slab’s condition before anchoring;
- Use the correct drill bit size for pilot holes․
- Tighten bolts in a star pattern to avoid uneven stress․

Post-Installation Checks
After installation, ensure the lift is level and securely anchored․ Test the lift with a known weight to verify smooth operation․ Check all safety features, such as locks and controls, for proper function․ Review the manual for any additional post-installation checks to ensure everything operates as intended․ These steps guarantee safe and reliable performance․
5․1․ Leveling the Lift for Proper Operation
Ensure the lift is perfectly level to guarantee safe and efficient operation․ Use a spirit level to check the base and columns․ Adjust the leveling bolts or shims as needed to achieve even ground contact․ Verify that all arms and posts are aligned and plumb․ Once leveled, tighten all anchor bolts securely to prevent movement․ Double-check the lift’s stability before testing with a vehicle․ Proper leveling ensures smooth functionality and prevents potential safety hazards or mechanical issues during use․ Always refer to the manual for specific leveling instructions․
5․2․ Testing the Lift’s Functionality
After installation and leveling, test the lift’s functionality by operating it through its full range of motion․ Ensure all components move smoothly and quietly․ Check that the safety locks engage properly at each designated height․ Perform a trial run without a vehicle to verify consistent operation․ Test the hydraulic system and electrical controls for any leaks or malfunctions․ Once satisfied, load a vehicle within the weight capacity and raise it to ensure stability and proper function․ Address any issues immediately to guarantee safe and reliable performance․
- Ensure smooth operation of all moving parts․
- Verify safety locks engage at correct heights․
- Check for hydraulic or electrical issues․
Maintenance and Regular Inspections
Regularly inspect and maintain the lift to ensure optimal performance and safety․ Check hydraulic lines, cables, and locking mechanisms for wear․ Lubricate moving parts as recommended․ Schedule annual professional inspections to comply with safety standards․ Keep the lift area clean and free of debris․ Refer to the manual for detailed maintenance intervals and procedures․
- Inspect hydraulic lines and cables for damage․
- Lubricate moving parts to prevent wear․
- Schedule annual professional inspections․
6․1․ Schedule for Routine Maintenance
Establish a routine maintenance schedule to ensure the lift operates safely and efficiently․ Inspect hydraulic lines, cables, and locking mechanisms monthly․ Lubricate all moving parts every 3 months․ Check for wear on rubber pads and replace as needed․ Perform a thorough annual inspection, including testing all safety features․ Keep a maintenance log to track inspections and repairs․ Address any issues promptly to prevent downtime․ Always refer to the manufacturer’s maintenance intervals for specific recommendations․
- Monthly: Inspect hydraulic lines and cables․
- Quarterly: Lubricate moving parts․
- Annually: Test safety features and inspect rubber pads․

Document all maintenance activities for future reference․
6․2․ Lubrication of Moving Parts
Lubricate all moving parts of the rotary lift regularly to ensure smooth operation and prevent wear․ Use high-grade, moisture-resistant grease for hydraulic cylinders, pivot pins, and arm joints․ Apply silicone-based spray lubricant to cables and pulleys․ Avoid over-lubrication to prevent attracting dirt and debris․ Inspect and clean old grease before reapplying․ Refer to the manufacturer’s recommendations for specific lubricants and intervals․ Proper lubrication extends the lift’s lifespan and maintains optimal performance․
- Lubricate hydraulic cylinders and pivot pins monthly․
- Use silicone-based sprays for cables and pulleys․
- Clean old grease before reapplying new lubricant․
Document lubrication dates in a maintenance log for tracking․
Troubleshooting Common Issues
Identify and resolve common issues like uneven lifting or hydraulic leaks by consulting the manual․ Contact Rotary Lift support for professional assistance if problems persist․
- Check for loose bolts or improper leveling․
- Inspect hydraulic lines for damage or leaks․
- Ensure control panels are functioning correctly․
7․1․ Identifying and Resolving Installation Errors
Inspect for common installation mistakes, such as improper leveling or loose bolts․ Verify all components are securely fastened and aligned according to the manual․ If the lift malfunction occurs, check for hydraulic leaks or electrical issues․ Consult the troubleshooting section of the installation guide for specific solutions․ Ensure the concrete slab meets the required thickness and strength specifications․ If issues persist, contact Rotary Lift support for professional assistance․ Always refer to the manual for detailed diagnostic procedures to resolve installation-related problems effectively․
7․2․ Addressing Post-Installation Malfunctions
After installation, if the lift fails to function correctly, check the hydraulic system for leaks or blockages․ Ensure all electrical connections are secure and meet the specified voltage requirements․ Lubricate moving parts if they show signs of wear or friction․ If the lift is uneven, adjust the leveling pads and recheck the balance․ Refer to the troubleshooting guide in the manual for specific malfunctions, such as arm drift or control panel errors․ Contact Rotary Lift support for advanced issues that cannot be resolved independently․ Regular maintenance can prevent many post-installation malfunctions․

Additional Resources
Visit the official Rotary Lift website for the latest installation manuals and guides․ Contact Rotary Lift customer support for technical assistance or troubleshooting help․
- Download the PDF manual from the manufacturer’s official site․
- Reach out to certified support for professional guidance․
8․1․ Where to Find the Installation Manual Online
The Rotary Lift installation manual is available on the official Rotary Lift website․ Visit the “Support” or “Resources” section, where you can search for the specific model manual․ Use the search bar to enter your lift model number or name to find the PDF document․ Ensure to download the correct version matching your lift’s specifications․ The manual is regularly updated, so always verify the latest version․ For assistance, contact Rotary Lift customer support for direct links or guidance․
8․2․ Contacting Rotary Lift Support for Assistance
For any questions or issues during installation, contact Rotary Lift’s dedicated support team․ Visit their official website and navigate to the “Contact Us” page for phone numbers, email addresses, and live chat options․ Ensure to provide your lift model and serial number for prompt assistance․ Their team is available to address installation queries, clarify manual instructions, and provide technical support․ For urgent matters, call their customer service hotline․ Additionally, authorized distributors can offer localized support and guidance․
- Phone: Available on the official website․
- Email: Submit queries through the contact form․
- Live Chat: Available during business hours․
Proper installation ensures safety and optimal performance․ Adhere to guidelines, prepare thoroughly, and maintain compliance․ Always follow the manual for best results․
9․1․ Final Tips for a Successful Installation
Ensure all tools and materials are organized before starting․ Double-check inventory for completeness and verify all bolts are tightened to specifications․ Always follow torque recommendations for secure anchoring․ Properly test the lift’s functionality post-installation to ensure smooth operation․ Maintain regular inspections and lubricate moving parts as outlined in the manual․ Keep the installation manual handy for future reference and troubleshooting․ A well-planned and executed installation ensures safety, efficiency, and longevity of your Rotary lift․
